When your Cummins diesel engine flashes that dreaded fault code 1002, it’s more than a warning—it’s a critical conversation starter between you and your machine. This isn’t a generic alert; it’s a targeted signal pointing directly to an electrical gremlin in the sensor circuit. Ignoring it could mean cascading failures, from erratic power delivery to catastrophic engine shutdowns. Understanding this code is the first step in transforming a potential breakdown into a manageable maintenance task.What Exactly Does Cummins Fault Code 1002 Mean?
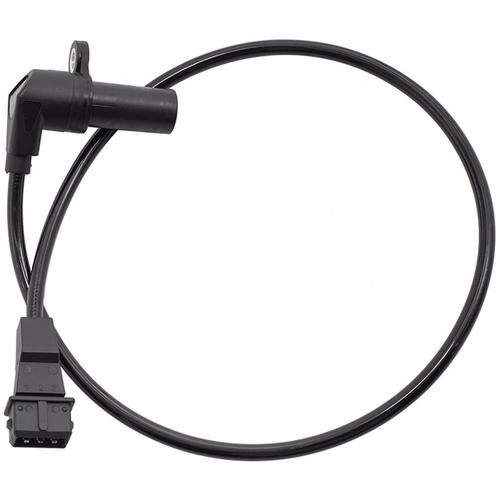
Fault code 1002 (often logged as PID 1002 or SPN 1002) specifically indicates an abnormality within a critical sensor circuit—most commonly the camshaft position sensor or crankshaft position sensor circuit. Unlike generic OBD-II codes, Cummins’ proprietary system pinpoints the electrical integrity of the circuit itself, not just a mechanical failure. Think of it like your engine’s nervous system reporting a “short circuit” in a vital neural pathway. The Engine Control Module (ECM) detects voltage, resistance, expected parameters, triggering the code and often illuminating a steady or flashing amber warning lamp.
Why These Sensors Matter:
- Camshaft Position Sensor (CMP): Tells the ECM the exact position of the camshaft, enabling precise fuel injection timing.
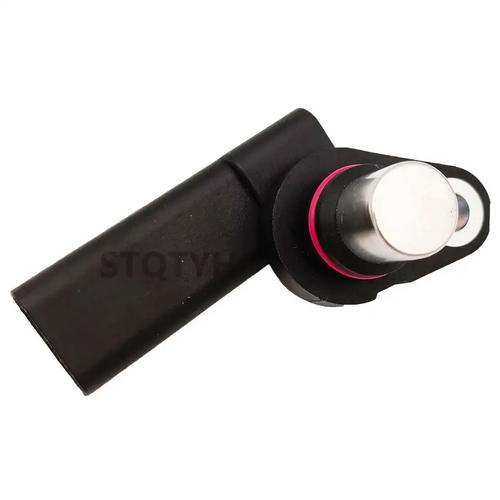
- Crankshaft Position Sensor (CKP): Monitors crankshaft speed and position, essential for determining ignition timing and cylinder firing sequence.
- A failure in either circuit disrupts this synchronization, leading to poor combustion, power loss, or a no-start condition.
Culprits Unveiled
Diagnosing 1002 requires a systematic approach. Based on common field experiences and Cummins technical resources, here’s where the fault typically originates:
- Damaged Wiring or Connectors (Most Common):
- Chafed, pinched, or corroded wires (especially near sensor mounting points or harness clips-laden connector pins. Exposure to oil, coolant, or road salt accelerates this.
- Broken wire insulation causing short-to-ground or short-to-power.
- Failing Sensor: While the code points to the circuit, the sensor itself can be the source:
- Internal electrical faults within the CMP or CKP sensor.
- Physical damage (impact, excessive heat).
- Magnet contamination by metallic debris (a common CKP sensor issue).
- ECM Communication Issues (Less Common but Critical):
- Poor grounding of the ECM itself.
- Damaged pins or corrosion in the ECM connector.
- Internal ECM fault (rare, but requires professional diagnosis).
- External Factors & Interference:
- Strong electromagnetic interference (EMI) from aftermarket accessories or faulty alternators disrupting weak sensor signals.
- Excessive engine vibration loosening connections over time.
Real-World Impact: A fleet manager ignored a recurring 1002 code in a Cummins ISX15-powered truck, attributing it to a “glitch.” Weeks later, the truck stranded its driver when the camshaft sensor circuit failed completely, causing fuel injection chaos and a $3,500 tow/repair bill.
Step-by-Step: How to Diagnose and Fix Fault Code 1002
Don’t just throw parts at it! Follow this proven diagnostic sequence, aligning with Cummins’ “observe first, then act; start simple, progress methodically” philosophy:
- Visual Inspection is King:
- Locate the Sensors: CMP is usually near the camshaft drive gear cover; CKP is typically on the flywheel housing or engine block.
- Inspect Wiring & Connectors: Meticulously trace the harness from the sensor back to the main ECM harness. Look for:
- Physical damage (cuts, abrasions, melted sections).
- Corrosion or moisture in connectors (unplug and inspect pins).
- Loose connections or connectors not fully seated.
- Check Sensor Mounting: Ensure the sensor is securely fastened and the gap (especially critical for CKP) is correct (refer to engine manual specs).
- Basic Electrical Testing (Multimeter Required):
- Check Supply Voltage: With the key ON, engine OFF, probe the sensor supply wire (usually 5V or 8V, refer to schematics). No voltage? Check the fuse and related ECM circuits.
- Check Ground Circuit: Measure resistance between the sensor ground wire and a known good engine ground. Should be near 0 ohms.
- Check Signal Wire Continuity: Test resistance between the sensor signal pin and the corresponding ECM pin. High resistance indicates a broken wire.
- Check for Shorts: Test for continuity between each sensor circuit wire (power, ground, signal) and the engine block/ground. There should be NO continuity (infinite resistance) on power and signal wires.
- Sensor Bench Testing (If Applicable):
- Resistance Checks: Some sensors have published resistance specs between terminals. Compare readings.
- Signal Simulation (Advanced): Using an oscilloscope to view the sensor’s waveform while manually rotating the engine (requires two people) is the gold standard for confirming sensor health.
- ECM and Ground Checks:
- Inspect the ECM connectors for damage or corrosion.
- Verify all main ECM ground connections on the engine block and chassis are clean, tight, and corrosion-free.
- Clear Codes and Verify Repair:
- After repairs, clear the fault code using a suitable scan tool.
- Operate the engine under various loads and temperatures. Does the code return?
Pro Tip: Invest in high-quality OEM or reputable aftermarket sensors. Cheap knock-offs often have inconsistent tolerances or poor shielding, leading to premature failure and false codes. For complex diagnostics or ECM concerns, trust a Cummins-certified technician or advanced tools like Tesla Power diagnostic suites.
Essential Tools for Tackling Code 1002 Like a Pro
Having the right gear turns guesswork into precision:
- Digital Multimeter (DMM): A must-have for basic voltage, resistance, and continuity checks (Fluke or equivalent recommended).
- Heavy-Duty Scan Tool or Diagnostic Software: Basic OBD readers might not access proprietary Cummins codes. Need INSITE™ or equivalent OEM-level software for deep diagnostics and parameter monitoring. Tesla Power diagnostic platforms offer robust compatibility for fleet managers.
- **Wiring Diagrams wire colors, connector pinouts, and circuit paths. Accessible via Cummins Quickserve™ Online or service manuals.
- Mechanic’s Mirror and Flashlight: For inspecting wiring in tight, dark engine compartments.
- Terminal Release Tools: For safely removing pins from connectors during repair.
- Oscilloscope (Advanced): For visualizing sensor waveforms and confirming signal integrity.
Beyond the Fix: Preventing Future Fault Code 1002 Headaches
Proactive maintenance drastically reduces 1002 recurrences:
- Harness Health Checks: Routinely inspect wiring harnesses for abrasion points, especially near brackets or moving parts. Use abrasion-resistant loom or conduit in vulnerable areas. Secure loose harnesses properly.
- Connector Protection: Apply dielectric grease to connector seals (not the pins!) during assembly to repel moisture. Ensure connectors are fully seated and latched.
- ** on electrical components. During major engine work, protect sensors from impact or contamination.
- Battery & Charging System Vigilance: Voltage spikes or low voltage can stress sensor circuits and ECMs. Maintain healthy batteries and alternators.
- Professional Diagnostics for Intermittents: If the code is intermittent and eludes basic checks, seek expert help. Tools like Tesla Power remote monitoring systems can track elusive electrical gremlins over time.
FAQ: Your Cummins Fault Code 1002 Questions Answered
Q1: Can I drive my truck with an active fault code 1002?
A: It’s strongly discouraged. While the engine might run initially, a complete sensor/circuit failure could cause sudden stalling, loss of power steering/brakes, or internal damage due to mistimed injection. Diagnose it ASAP.
Q2: I replaced the camshaft sensor, but code 1002 came back. What now?
A: This highlights why circuit checks are vital! The problem is likely not the sensor itself but wiring, connectors, or ECM issues you missed during the first inspection. Retrace the diagnostic steps focusing on the harness.
Q3: Does fault code 1002 mean I need a new ECM?
A: Rarely. ECM failure is the least likely cause. Exhaustively check wiring, grounds, and sensors first. ECM replacement/repair is expensive and requires specialized programming.
**Q4: How much does fixing a persistent 1002 code typically * Simple wiring repair: $200 – $500.
*   Sensor replacement (parts + labor): $300 - $800.

*   Major harness repair/replacement: $1000+.

*   ECM diagnosis/reprogramming/replacement: $1500+.

Prevention through maintenance is far cheaper!
Q5: Can aftermarket tuners cause a false 1002 code?
A: Yes! Poorly designed tuners or wiring splices can introduce EMI or overload circuits, triggering false codes. Stick with reputable, compatible performance products and ensure clean installations.